Mini Cheesecakes

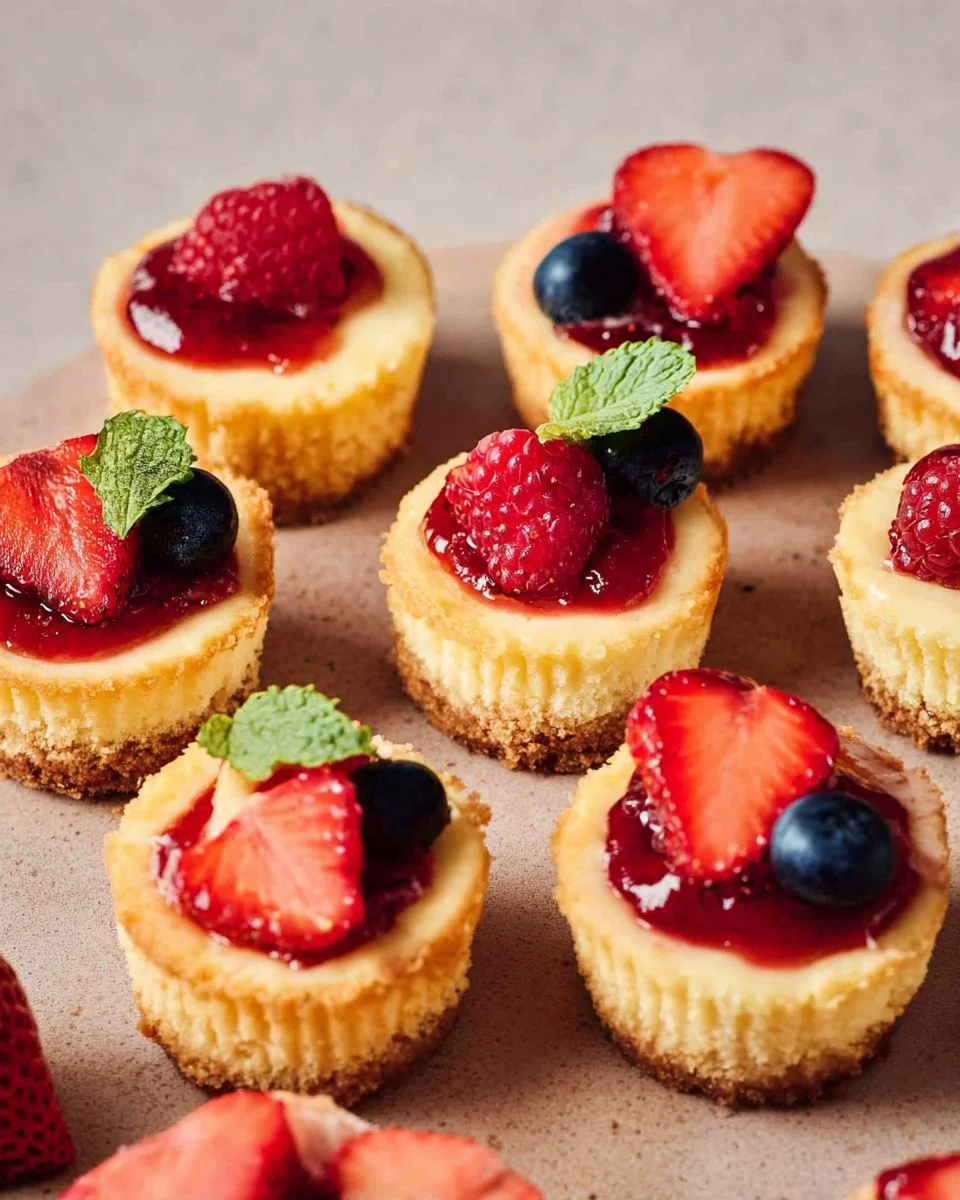
The sweet aroma of freshly baked mini cheesecakes fills the kitchen, wrapping you in a delightful embrace that’s impossible to resist. Imagine opening the oven door to reveal perfectly golden-topped bites of creamy goodness, each nestled in their charming muffin wrappers. As you plate them up, the glossy layer of strawberry jam glistens temptingly, inviting a taste. I can still recall the first time I made these for a family gathering — their happiness and the chorus of “More, please!” still echo in my heart.
These delightful desserts are ready to steal the show during any occasion, be it a holiday dinner, birthday bash, or a summer potluck. They’re fun, versatile, and surprisingly easy to whip up. If you’re eager to impress friends and family without spending all day baking, these mini cheesecakes are your secret weapon. Trust me, once you take that first bite, you’ll find it hard to stop at just one!
Table of Contents
Why You’ll Love This Recipe
- Simple & Quick: With just 15 minutes of active prep time, you can have these mini cheesecakes ready for the oven in a flash.
- Irresistible Flavor: The creamy texture combined with a hint of tanginess from the cream cheese creates an unforgettable taste.
- Eye-Catching Appeal: These little desserts look so adorable that they add an impressive touch to any table setting.
- Flexible Serving: Whether for an afternoon treat, party dessert, or morning brunch, they fit the bill perfectly.
- Diet-Friendly Options: Make them gluten-free by using gluten-free graham crackers, or experiment with different toppings to cater to various diets.
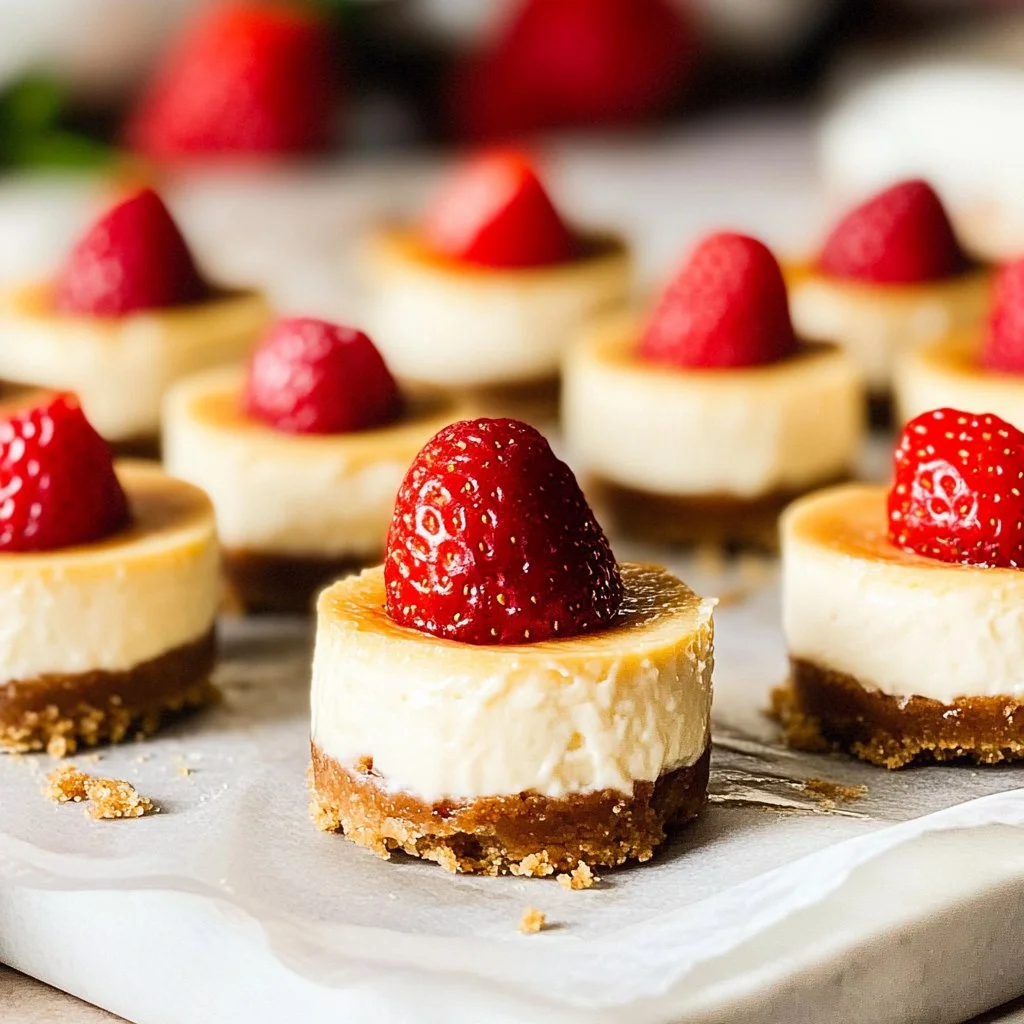
Ingredients You’ll Need
- 1 ½ cups graham cracker crumbs: These serve as the sweet and crunchy base for your cheesecakes. You can substitute them with crushed cookies or gluten-free options.
- ¼ cup melted butter: This helps bind the crumbs together and adds richness. Unsalted butter is best for a balanced flavor.
- 8 ounces cream cheese (softened to room temperature): Cream cheese gives these mini cheesecakes their signature creamy texture. Ensure it’s softened for easy mixing.
- ½ cup sugar: A touch of sweetness that complements the tang of the cream cheese. You can use granulated sugar or natural sweeteners as alternatives.
- 2 large eggs (room temperature): These help to create a luscious texture. For best results, ensure they are at room temperature before mixing.
- 1 teaspoon vanilla extract: This adds warmth and depth to the flavor. Opt for pure vanilla extract for the best taste.
- 1 tablespoon lemon juice: A slight hint of acidity enhances the overall flavor and balances the sweetness.
- 1 ½ tablespoons all-purpose flour: This stabilizes the filling, giving it structure. For gluten-free options, use almond flour or a gluten-free blend.
- 6 ounces heavy cream (room temperature): Incorporating heavy cream makes the filling extra rich and smooth, so don’t skip it!
- Strawberry jam: Sweet and fruity, it makes the perfect topping for a burst of flavor. Feel free to swap it for your favorite preserve.
- Fresh berries (or fruit of your choice): These make a refreshing topping to lighten up each bite.
How to Make Mini Cheesecakes
Preheat and Prepare: Start by preheating your oven to 320°F (160°C). While the oven is heating up, take a big bowl and combine the graham cracker crumbs with the melted butter, mixing until each crumb is well-coated. Align your muffin tin with 12 paper liners, then evenly distribute the crumb mixture between them, pressing down firmly with the back of a spoon to create a solid base. Set this aside while you prepare the filling.
Mix Cream Cheese: Grab your mixer and toss the softened cream cheese into the bowl. Beat it on low speed until it’s impeccably smooth and creamy. Gradually add in the sugar, mixing as you go, creating a wonderful sweet mixture. Introduce the eggs one at a time into the mix, blending just until combined. Then, stir in the vanilla, lemon juice, and flour to bring out those flavors a bit more.
Add Heavy Cream: Now comes the luxurious part! Pour in the heavy cream and give the mixture one last whip until it transforms into a silky filling. It should be beautifully smooth; this is what will make your **mini cheesecakes** so rich and luscious.
Spoon into Crusts: With your filling ready, it’s time to spoon or scoop it evenly over the crumb crusts in your muffin cups. Don’t be shy — fill them generously! Afterward, gently tap the pan on the counter to settle the filling and smooth the tops. This little trick helps with even baking.
Bake to Perfection: Slide the muffin tin into the preheated oven and let them bake for about 15 minutes. When done, the centers should be slightly jiggly but set. The edges will appear firm and the tops slightly puffed. Keep a watchful eye during the last few minutes — you want them just right!
Cool and Chill: Remove the cheesecakes from the oven and place them on a wire rack to cool down to room temperature. Once cooled, pop them in the refrigerator overnight. This waiting game ensures they fully set into creamy perfection and helps the flavors meld beautifully.
Add Toppings: When it’s finally time to serve, top each **mini cheesecake** with a spoonful of strawberry jam and a sprinkle of fresh berries or other fruits of your choice. It adds a lovely burst of freshness and color, making your desserts even more tempting.
Storing & Reheating
To keep your mini cheesecakes at their best, store them in an airtight container in the refrigerator for up to five days. If you’re looking to extend their delicious lifespan, freeze them for up to three months. For freezing, place them in a single layer in a freezer-safe container, separating layers with parchment paper. When ready to enjoy, allow them to thaw in the refrigerator. They’re best served cold, so no need to reheat unless you prefer them that way!
Chef’s Helpful Tips
- Ensure your cream cheese is at room temperature for easy blending; it makes a world of difference in achieving that smooth filling.
- Be careful not to overmix once you add the eggs; this keeps your cheesecakes light and prevents cracking.
- If you want an extra touch, consider adding a splash of almond extract alongside the vanilla for an enriched flavor.
- Avoid opening the oven door too soon to maintain steady heat, which is key for even baking.
- These cheesecakes are perfect for making ahead; they actually taste even better after sitting in the fridge for a day!
Surprise your family and friends with these charming mini cheesecakes that are sure to become an instant hit. Not only are they deliciously creamy and rich, but they also offer a visually stunning dessert option for any occasion. Experiment with different toppings and fillings to make them your own, and don’t hesitate to share your creative twists!
Recipe FAQs
Can I use a different type of crust?
How can I tell when my mini cheesecakes are done?
Can I make these mini cheesecakes ahead of time?
What if I can’t find heavy cream?
More Desserts & Appetizers Recipes
- Christmas Shortbread Cookies
- Mexican Street Corn Deviled Eggs
- Chocolate Cupcakes
- Beet Salad With Balsamic Dressing
- Bliss Balls
👉 If you make my Mini Cheesecakes recipe, please leave a comment and a star rating — it really helps others discover the recipe.
Follow me on
Pinterest
for more easy recipes.

Mini Cheesecakes
- Prep Time: 15 minutes
- Cook Time: 15 minutes
- Total Time: 30 minutes
- Yield: 12 servings 1x
- Category: Dessert
- Method: Baking
- Cuisine: American
Description
These mini cheesecakes are creamy, rich, and topped with strawberry jam for a delightful dessert. Easy to prepare and perfect for impressing guests at any gathering!
Ingredients
- 1 ½ cups graham cracker crumbs
- ¼ cup melted butter
- 8 ounces cream cheese (softened to room temperature)
- ½ cup sugar
- 2 large eggs (room temperature)
- 1 teaspoon vanilla extract
- 1 tablespoon lemon juice
- 1 ½ tablespoons all-purpose flour
- 6 ounces heavy cream (room temperature)
- Strawberry jam
- Fresh berries (or fruit of your choice)
Instructions
- Preheat oven to 320°F (160°C). Combine graham cracker crumbs and melted butter. Press into muffin liners in a tin.
- Beat softened cream cheese until smooth. Gradually add sugar, then eggs, mixing well.
- Stir in vanilla, lemon juice, and flour. Add heavy cream and whip until smooth.
- Scoop cream cheese mixture into crusts. Bake for about 15 minutes until slightly jiggly.
- Cool to room temperature, then refrigerate overnight.
- Top with strawberry jam and fresh berries before serving.
Notes
Make gluten-free by using gluten-free graham crackers.
Use room temperature ingredients for best results.
Store in the refrigerator for up to five days.
Nutrition
- Serving Size: 1 mini cheesecake
- Calories: 205
- Sugar: 9g
- Sodium: 130mg
- Fat: 13g
- Saturated Fat: 8g
- Unsaturated Fat: 4g
- Trans Fat: 0g
- Carbohydrates: 19g
- Fiber: 1g
- Protein: 3g
- Cholesterol: 45mg