No Knead Bread

The scent of fresh bread wafting through the house creates an experience unlike any other. Picture this: a golden crust forming in the oven, the warm, yeasty aroma enveloping your kitchen, and the anticipation building as you wait to slice into that warm loaf. It’s a sensory delight that never fails to bring a smile, especially on a crisp autumn day or during a cozy winter evening. I still remember the first time I made no knead bread; it was a family gathering, and as I pulled that beautifully risen loaf from the oven, the delight on everyone’s faces is a memory I cherish.
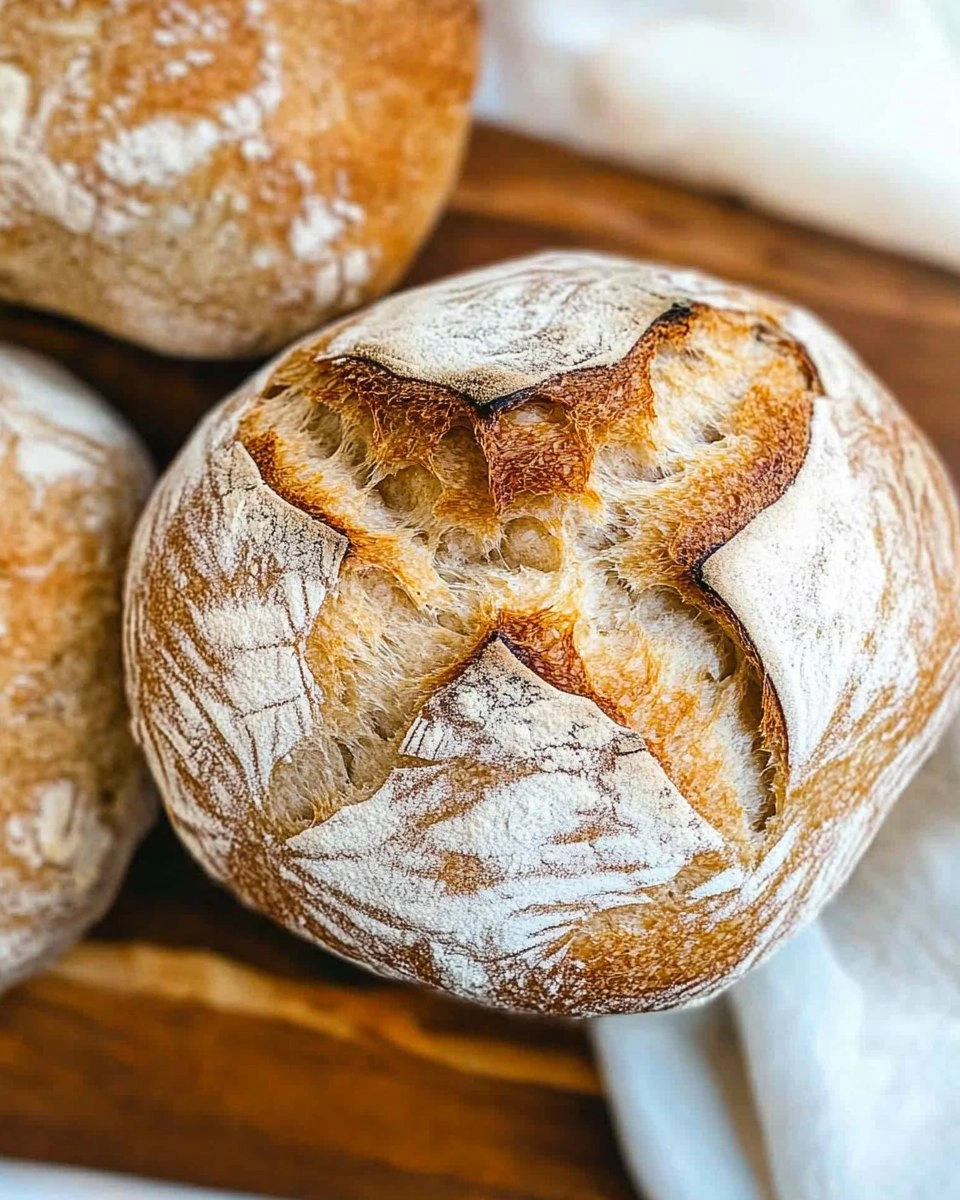
This no knead bread recipe is so simple, so satisfying, that you’ll want to make it time and again, whether it’s for a holiday feast or just an everyday treat. I can’t wait to share this gem with you, so let’s dive in and create something deliciously memorable together!
Table of Contents
Why You’ll Love This Recipe
- Simple & Quick: With just a few minutes of hands-on time and an overnight rest, you can have freshly baked bread.
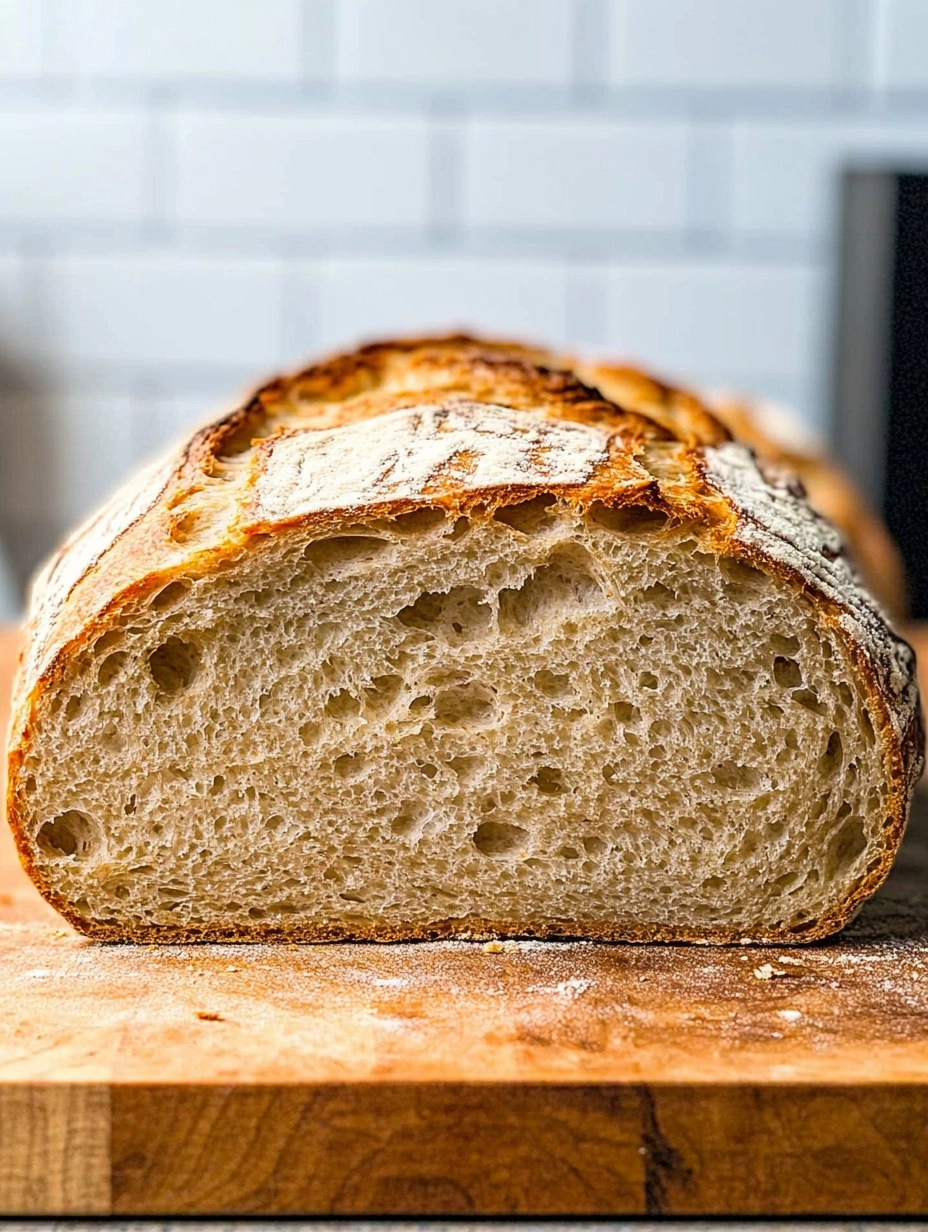
- Irresistible Flavor: Each slice brings a crusty exterior and a soft, chewy interior that’s perfect for slathering with butter or dipping in olive oil.
- Eye-Catching Appeal: Your guests will be wowed by the impressive look of artisan-style bread that seems too good to be true.
- Flexible Serving: Perfect for breakfast toast, a side at dinner, or a snack anytime. It’s versatility at its best!
- Diet-Friendly Options: You can easily adapt this recipe to be vegan or use gluten-free flours for those with specific dietary needs.
Ingredients You’ll Need
- 3 cups all-purpose flour (375 grams): This forms the base of your bread, providing structure. You can substitute with bread flour for a chewier texture.
- 1/2 cup whole wheat flour (62 grams): Adds nuttiness and fiber. Feel free to use spelt or rye flour for a different flavor profile.
- 1/2 teaspoon instant or active dry yeast: A tiny amount goes a long way in helping the bread rise. Instant yeast needs no proofing, making it easier!
- 9 grams (1 1/2 teaspoons) kosher salt: Enhances flavor and balances the dough. Adjust to taste if using table salt.
- 1 1/3 cups water (314 grams): Warm water activates the yeast. Don’t use boiling water; it can kill the yeast.
- 1 tablespoon apple cider vinegar (15 grams): Improves the bread’s texture while adding a mild tang. You may substitute with white vinegar if needed.
How to Make No Knead Bread
Combine Dry Ingredients: In a medium bowl, stir together the all-purpose flour, whole wheat flour, yeast, and salt. Mixing these dry ingredients well ensures even yeast distribution. The smell of the flour will remind you of bakeries, igniting your anticipation for the finished product.
Whisk Wet Ingredients: Add warm water and apple cider vinegar to the flour mixture. Stir with a wooden spoon or dough whisk until the flour is fully incorporated. It’s okay if the dough feels sticky and messy; trust me, that’s what you want! Cover the bowl with plastic wrap or place it in a proofing bag and let it rest at room temperature overnight (12 to 18 hours). When you uncover it, you’ll find a bubbly and lively dough waiting to be shaped.
Fold and Shape: Transfer the dough onto a clean, lightly floured countertop. Gently spread it into a cohesive square or rectangle, then fold each side towards the center to form a packet. This shaping builds tension in the dough. Flip it over and gently pull the dough towards you to create a tight boule shape, adding firmness. This technique helps develop a desirable crusty exterior.
Rest the Boule: Place your shaped boule on a piece of parchment paper that’s twice the width of the dough. Cover it with an inverted large bowl and allow it to rest for an additional hour. This rest is essential for creating an open crumb texture that’s airy and light.
Preheat and Prepare: While the dough is resting, preheat your Dutch oven (lid on) to 475°F (245°C) for 30 minutes. If you’re using a pizza stone, place it on the middle rack with a heavy cast iron pan or thick baking sheet on the rack below; this will create steam for a perfect crust when you bake.
Score the Dough: After the dough has rested, use a sharp knife or lame to cut several shallow slashes across the top. This scoring allows the bread to expand in the oven without bursting and adds a rustic touch.
Bake the Bread: Carefully transfer the dough (still on the parchment paper) into the preheated Dutch oven with gloves to avoid burns. Cover it with the lid and bake for 16 minutes. For pizza stone users, gently transfer the dough to the stone, then pour 1 cup of water into the cast iron pan below to create steam before closing the oven door quickly.
Reduce Heat and Finish Baking: After 16 minutes, reduce the oven temperature to 400°F (200°C). Remove the Dutch oven lid or open the oven door to release excess moisture for those using a pizza stone. Bake for an additional 25 to 27 minutes, until the bread sounds hollow when tapped or registers an internal temperature of 205-209°F (96-98°C) when checked with a thermometer.
Cool Completely: Carefully remove the bread from the Dutch oven (or from the pizza stone) and let it cool on a cooling rack for at least 45 minutes. This cooling time is critical; cutting too early may ruin that beautiful texture!
Storing & Reheating
Once cooled, store your homemade bread wrapped in a cloth or in a breathable bread bag on the counter for up to 2 days; avoid plastic since it traps moisture and makes the crust soggy. If you need to store it longer, consider slicing the loaf, wrapping it in foil, and placing it in a plastic bag in the freezer, where it will last for up to 3 months. To rejuvenate frozen bread, simply toast slices or pop them in a warm oven for a few minutes to restore its crustiness.
Chef’s Helpful Tips
- Avoid over-mixing the dough; it should remain sticky and shaggy for the best texture.
- Use a kitchen scale for accuracy when measuring your flour, which can greatly affect your bread.
- Keep the dough covered during fermentation to prevent it from drying out.
- If your kitchen is cool, consider moving the dough to a warm spot to help it rise effectively.
- Feel free to experiment by adding herbs, spices, or even cheese to the dough for unique flavors.
The satisfaction derived from baking bread at home is truly special. With this no knead bread recipe, you enjoy the cozy aroma and the rush of taking that first bite. Feel free to play around with the ingredients, maybe try adding olives or sun-dried tomatoes for a Mediterranean twist. Homemade bread is a timeless treat, perfect for sharing or keeping all to yourself. So gear up and get baking; your kitchen is about to be filled with warmth and happiness!
Recipe FAQs
Can I use whole wheat flour only?
Can I let the dough rise for more than 18 hours?
What do I do if my bread doesn’t rise?
Can I make this bread without a Dutch oven?
More Dinner Recipes
- Soft & Fluffy Homemade Sandwich Bread
- French Bread Rolls
- Soft Air Fryer Dinner Rolls
- Irish Soda Bread
- Hot Cross Buns
👉 If you make my No Knead Bread recipe, please leave a comment and a star rating — it really helps others discover the recipe.
Follow me on
Pinterest
for more easy recipes.
No Knead Bread
- Prep Time: 90 minutes
- Cook Time: 130 minutes
- Total Time: 3 hours 40 minutes
- Yield: 12 servings 1x
- Category: Bread
- Method: Baking
- Cuisine: American
Description
This No Knead Bread is a homemade delight, perfect for any meal. With its irresistible flavor and simple prep, it’s a must-try for those looking for a quick, tasty bread option.
Ingredients
- 3 cups all purpose flour (375 grams)
- 1/2 cup whole wheat flour (62 grams)
- 1/2 teaspoon instant or active dry yeast
- 9 grams 1 1/2 teaspoons kosher salt
- 1 1/3 cups water (314 grams)
- 1 tablespoon apple cider vinegar (15 grams)
Instructions
- In a medium bowl, mix the all-purpose flour, whole wheat flour, yeast, and salt. Add warm water and vinegar, stirring until all flour is combined. Cover and let rest at room temperature overnight (12 to 18 hours) until bubbly and sticky.
- On a lightly-floured surface, place the dough and gently shape it into a square. Fold each side inward, then flip it over to create tension on the outside. Shape into a boule by gently pulling towards you and rotating as needed.
- Transfer the boule onto a piece of parchment paper and cover with a large inverted bowl for one hour.
- Preheat the Dutch oven at 475°F for 30 minutes (or prep a pizza stone with a cast iron pan below).
- Make shallow slits across the top of the dough using a sharp knife or lame.
- Quickly place the dough on the parchment into the preheated Dutch oven and cover. Bake for 16 minutes (or on pizza stone, pour water into the pan for steam).
- Lower the oven temperature to 400°F. After 16 minutes, remove the Dutch oven and place the bread on the oven rack. Bake for another 25 to 27 minutes until hollow when tapped or internal temp is 205 to 209°F.
- Allow the bread to cool on a rack for at least 45 minutes. Store wrapped in cloth or a bread bag on the counter for up to 2 days or freeze (sliced) for several months.
Notes
For best results, use a kitchen scale for precise measurements.
Allow sufficient time for resting to develop flavor and texture.
Store leftover bread wrapped in a cloth to maintain its crust.
Nutrition
- Serving Size: 1 slice
- Calories: 120
- Sugar: 0g
- Sodium: 230mg
- Fat: 1g
- Saturated Fat: 0g
- Unsaturated Fat: 0g
- Trans Fat: 0g
- Carbohydrates: 25g
- Fiber: 2g
- Protein: 4g
- Cholesterol: 0mg