Slice and Bake Christmas Cookies

The air fills with the warm, sweet aroma of freshly baked cookies, a delightful scent that evokes memories of bustling kitchens and joyful laughter during the holidays. As snowflakes gently fall outside, the kitchen transforms into a cozy sanctuary, where colorful slices of festive cookies await. These slice and bake Christmas cookies are not just treats; they are little pieces of edible joy wrapped in vibrant colors—perfect for adding a splash of cheer to any festive gathering.
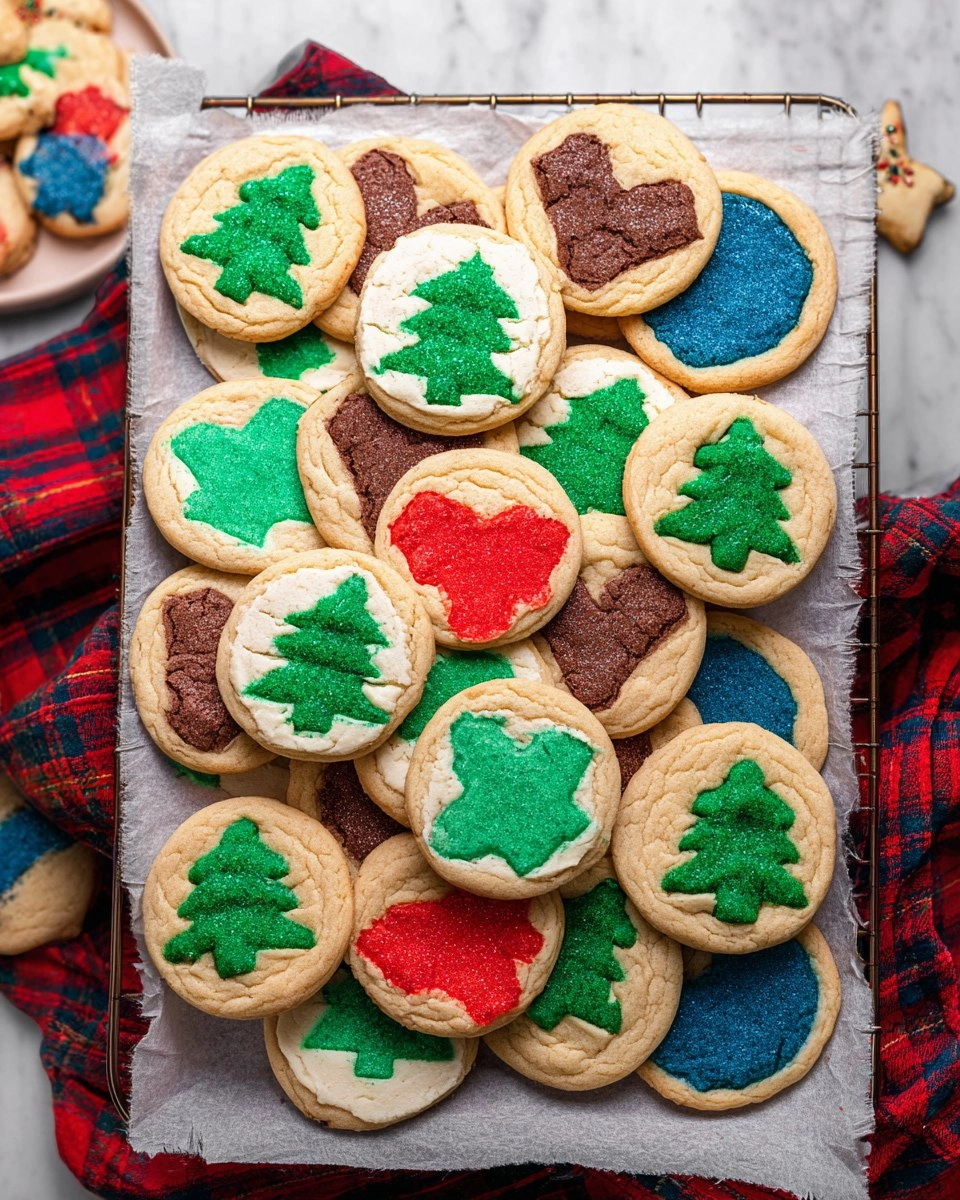
There’s something incredibly special about making these cookies that takes me back to my childhood. I can still picture my grandmother and me standing side by side, our hands dusted with flour, as we eagerly mixed ingredients and shared giggles over spilled sugar. Oh, those joyful moments! With the holiday season upon us, now feels like the perfect time to recreate that warmth in our homes. Let’s make these wonderful slice and bake Christmas cookies together!
Table of Contents
Why You’ll Love This Recipe
- Simple & Quick: With a prep time of only 25 minutes, you can have these cookies ready to bake in no time.
- Irresistible Flavor: Each bite is a dreamy combination of buttery, sweet goodness with a light, soft texture.
- Eye-Catching Appeal: The colorful layers are not only fun but also perfect for impressing family and friends.
- Flexible Serving: Ideal for holiday parties, gifts, or simply enjoying with a steaming cup of cocoa.
- Diet-Friendly Options: Easily customizable for various diets; think gluten-free or vegan!
Ingredients You’ll Need
- Unsalted Butter (1 cup/227 grams): Gives a rich, creamy texture. Make sure it’s softened at room temperature for easy blending. You can substitute with vegan butter if needed.
- Confectioners’ Sugar (3/4 cup/90 grams): This light sugar adds sweetness without any graininess. Regular granulated sugar can be used in a pinch but might change the texture.
- White Sugar (3/4 cup/150 grams): Balances the flavors and helps achieve those perfect chewy edges. Brown sugar can add a depth of flavor if you want to mix things up.
- Vanilla Extract (1 ½ teaspoons): Use pure vanilla for the best flavor; imitation vanilla will work but lacks richness.
- Eggs (2): These bind the ingredients together and give the cookies a lovely structure. Room temperature eggs incorporate better into the batter.
- All-Purpose Flour (4 cups/480 grams): Provides the main structure. If you need a gluten-free alternative, consider a 1:1 gluten-free flour blend.
- Baking Powder (3/4 teaspoon): Provides a light lift. Make sure to check the expiration date for the best results.
- Salt (1/4 teaspoon): Enhances flavor, bringing out the sweetness in the cookies. Always use fine sea salt or table salt for even distribution.
- Gel Food Coloring: Adds festive colors to your cookies. Gel is preferred over liquid as it doesn’t alter the dough consistency.
How to Make slice and bake christmas cookies
Combine Dry Ingredients: Start by whisking together the flour, baking powder, and salt in a large mixing bowl until fully combined. This step ensures even distribution of the leavening agent and helps prevent any clumps in the dough.
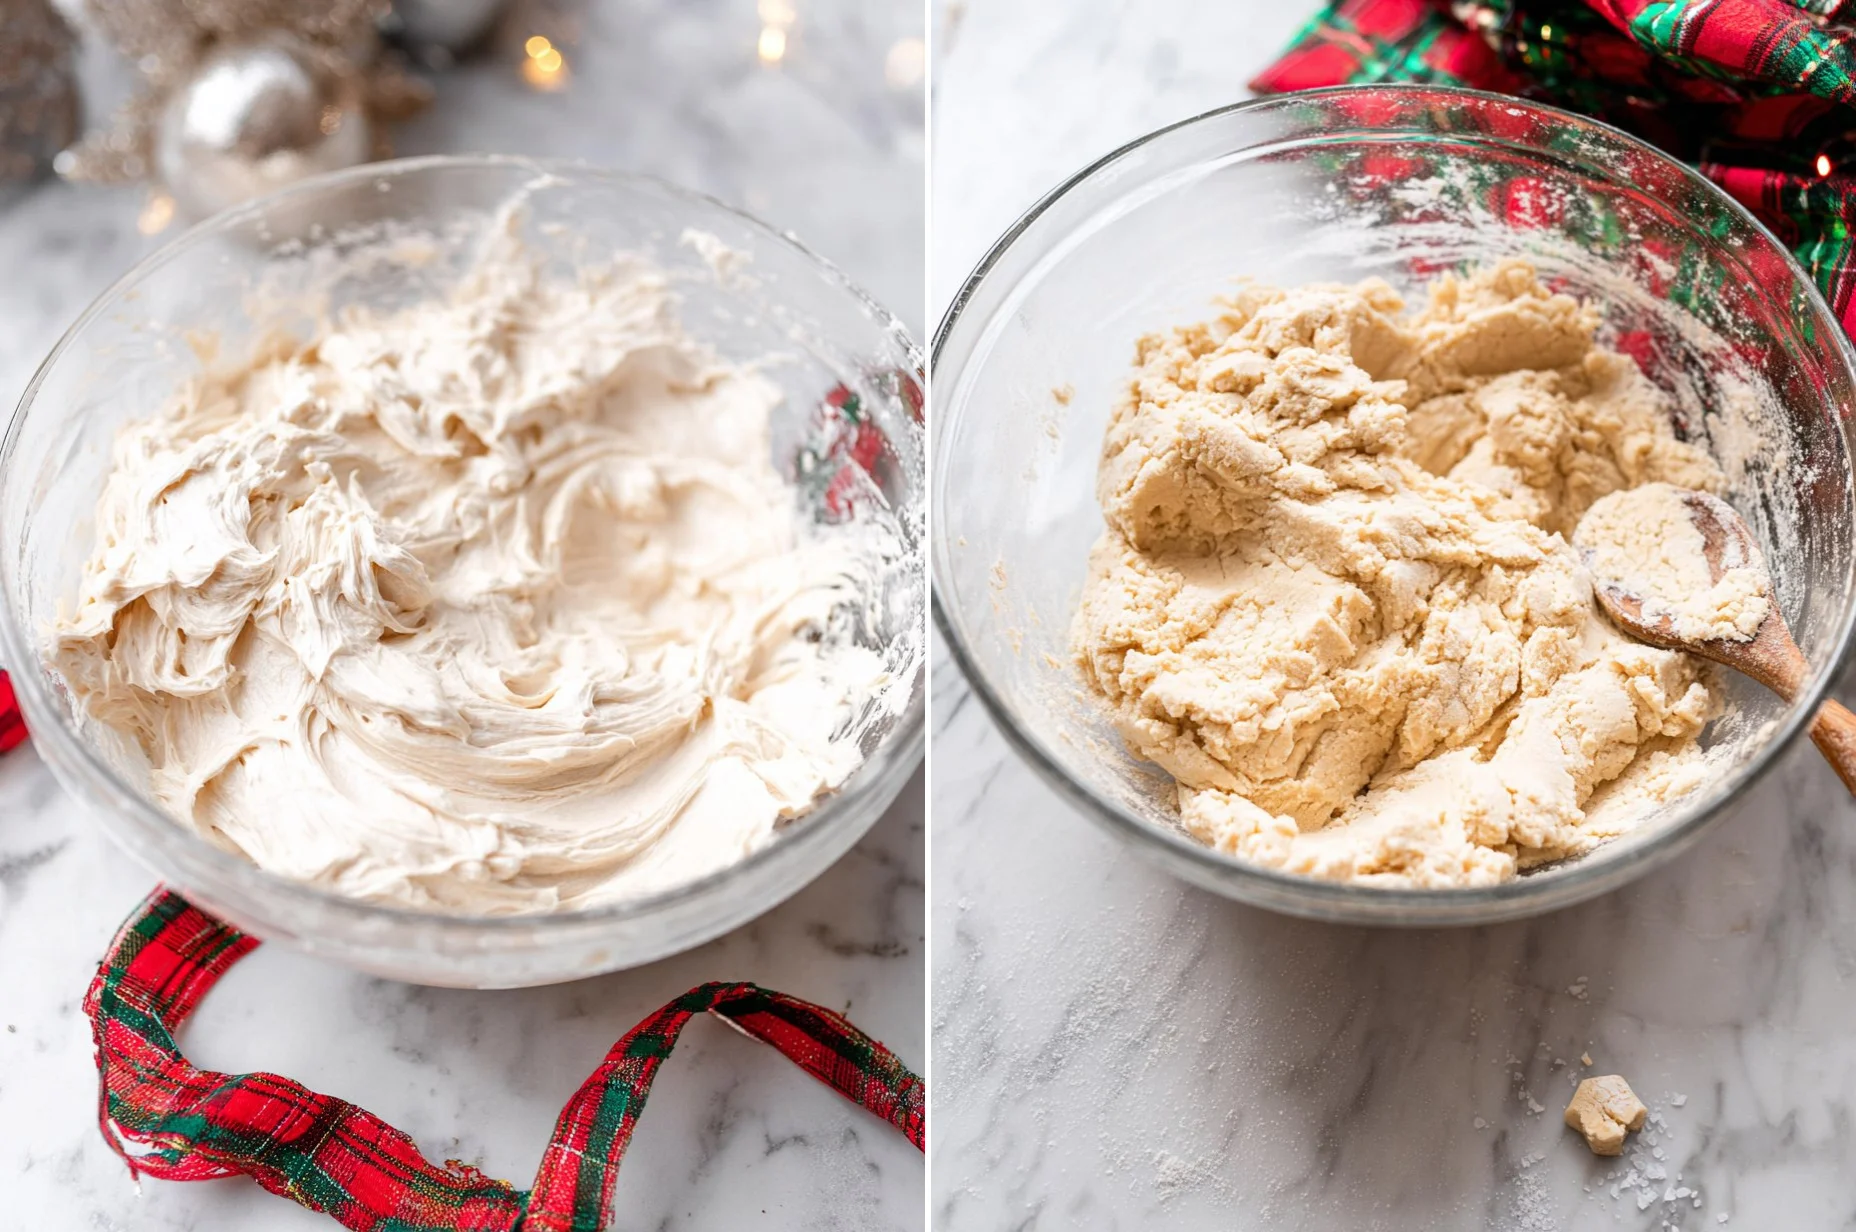
Cream Butter and Sugars: In another large mixing bowl, beat the softened butter, confectioners’ sugar, and white sugar together with a hand mixer on high speed for about 3 minutes. This will create a light and fluffy mixture that is crucial for the cookie’s texture. Keep going until it’s noticeably airy!
Add Wet Ingredients: Pour in the vanilla extract and crack in the eggs, then beat the mixture again until everything is well blended and smooth. You’ll want to scrape down the sides of the bowl to ensure no ingredient is left behind—trust me, each speck counts!
Mix Dry and Wet Ingredients: Gently fold the dry ingredient mixture into the wet mixture until a soft dough forms. It should not feel sticky—if it does, a tad more flour might be necessary. This step creates the foundation for our delicious cookies.
Chill the Dough: Wrap two-thirds of the plain dough in plastic wrap and place it in the refrigerator. To the remaining one-third, divide it into as many portions as colors you’d like to add. For example, if you choose three colors, you’ll have three smaller pieces ready for a splash of festivity.
Color the Dough: Add gel food coloring to each portion of dough. Use gloves or do this with a mixer to avoid staining your hands. Once your shades are vibrant enough for the holiday season, wrap each color tightly in cling wrap and refrigerate them for at least an hour.
Roll and Stack: After chilling, roll each colored dough portion to about 1/2 inch thick. Utilize mini cookie cutters to create fun shapes, stacking identical ones into firm towers. Repeat for each color and freeze the stacks for a minimum of 4 hours to harden them completely.
Softening the Dough: About three hours into freezing, take the plain dough out of the refrigerator and let it sit at room temperature for approximately one hour. This will make it easier to mold around your colorful stacks.
Wrap Color Stacks: Once ready, retrieve the frozen stacks of colorful shapes. Form balls of the softened plain dough and press them around each stack, ensuring a tight fit and smoothing it all into a log shape. For tricky shapes like snowflakes, press small pieces of dough into crevices to ensure they are fully encased.
Shape the Logs: Roll logs gently between your palms until they are perfectly smooth and even. Wrap the logs tightly in cling wrap and return to the freezer for a minimum of 4 hours or, better yet, overnight for precision in slicing later.
Prepare to Bake: Preheat your oven to 350°F (175°C) and line two baking sheets with parchment paper.
Slice Cookies: Retrieve the frozen logs from the freezer and let them sit for around 20 minutes. Using a sharp knife, slice the logs into 1/4-inch thick cookies. Visualize perfect circular shapes as you cut; this will help them bake evenly!
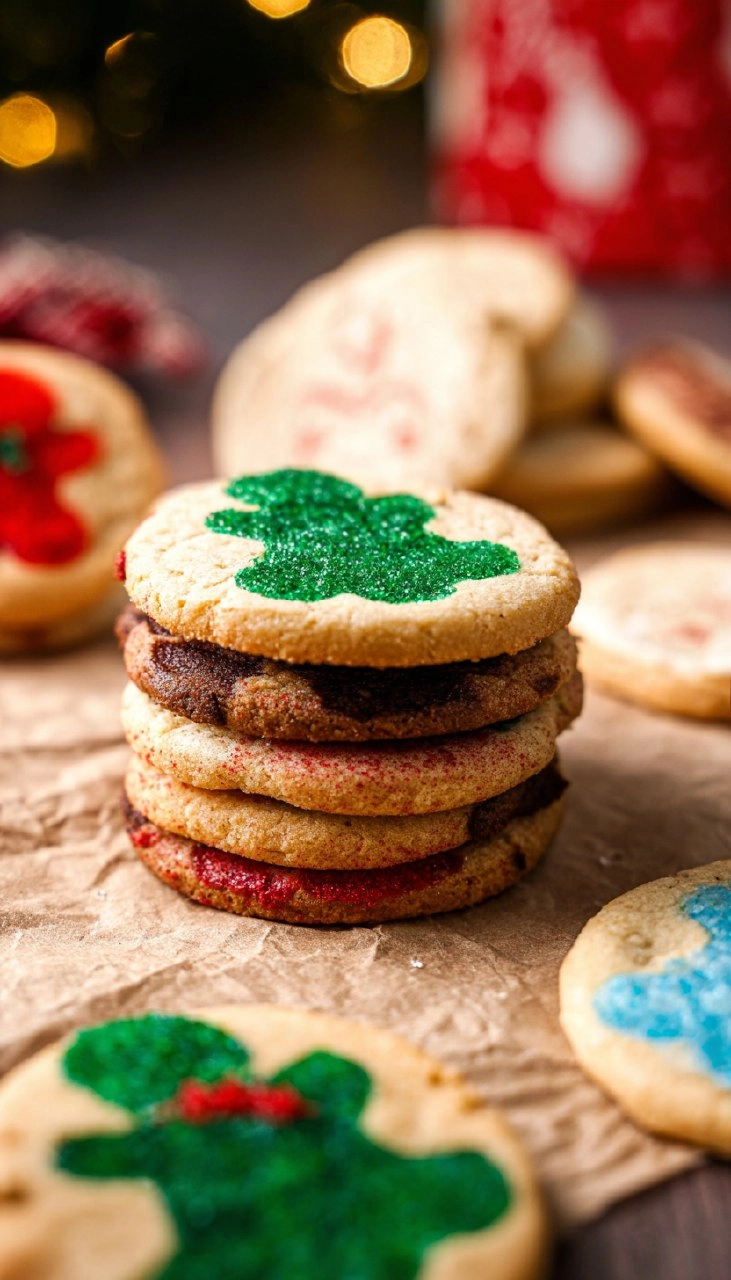
Bake Until Golden: Place the slices on the prepared baking sheets, ensuring there’s space between each one. Bake for 9-10 minutes, or until the edges are just lightly golden. You’ll know they’re done when the delightful scent wafts through your home—absolutely irresistible!
Storing & Reheating
To keep your slice and bake Christmas cookies fresh, store them in an airtight container at room temperature for up to a week. If you want to save them longer, refrigeration is also an option, but aim to consume them within 2 weeks. For longer storage, freeze the cookie logs wrapped tightly in plastic cling wrap, then sealed in a freezer bag. They can last for up to 3 months! When you’re ready to indulge, simply slice and bake directly from the freezer, adjusting your baking time just slightly.
Chef’s Helpful Tips
- Be careful not to overmix the dough; this could lead to tough cookies.
- Always use room temperature eggs and softened butter for the best mixing.
- If the dough is too warm, it can be hard to handle. Keep the logs chilled until you’re ready to slice.
- Pay attention to color mixing; start with a small amount of gel food coloring, as it’s often more potent than you think!
- Enjoy making a variety of shapes and colors to cater to different holiday themes.
- You can roll the unbaked cookies in festive sprinkles before baking for extra cheer.
The magic of slice and bake Christmas cookies lies not only in the delightful flavors but also in the memories you can create while baking them. Each colorful, buttery bite takes me back to cherished moments spent in the kitchen, and I encourage you to bring your creative flair to this recipe. Whether you want to share them with friends and family or simply indulge yourself, these cookies are sure to spread joy.
Recipe FAQs
Can I make slice and bake Christmas cookies ahead of time?
What can I substitute for butter?
How do I store leftover cookies?
Can I freeze the baked cookies?
More Desserts & Appetizers Recipes
👉 If you make my Slice and Bake Christmas Cookies recipe, please leave a comment and a star rating — it really helps others discover the recipe.
Follow me on
Pinterest
for more easy recipes.

Slice and Bake Christmas Cookies
- Prep Time: 25 minutes
- Cook Time: 10 minutes
- Total Time: 35 minutes
- Yield: 24 cookies 1x
- Category: Desserts & Appetizers
- Method: Baking
- Cuisine: Holiday
Description
These slice and bake Christmas cookies are a delightful blend of buttery flavor and vibrant colors, making them the perfect treat for any festive occasion. Easy to prepare and fun to customize, they capture the essence of holiday joy in every delicious bite.
Ingredients
- 1 cup unsalted butter, softened
- 3/4 cup confectioners' sugar
- 3/4 cup white sugar
- 1 ½ teaspoons vanilla extract
- 2 eggs
- 4 cups all-purpose flour
- 3/4 teaspoon baking powder
- 1/4 teaspoon salt
- Gel food coloring
Instructions
- Whisk together flour, baking powder, and salt in a large bowl.
- Cream the butter, confectioners' sugar, and white sugar until light and fluffy.
- Add vanilla extract and eggs, mix until smooth.
- Fold dry ingredients into wet until a soft dough forms.
- Chill two-thirds of the plain dough, color the remaining one-third with gel food coloring.
- Roll colored dough, stack in firm towers, and freeze for 4 hours.
- Soften the plain dough, wrap it around colored stacks, shape into logs, and freeze again.
- Preheat oven to 350°F (175°C) and prepare baking sheets.
- Slice logs into 1/4-inch thick cookies and bake for 9-10 minutes until slightly golden.
Notes
Use room temperature ingredients for the best results.
Chill dough enough to avoid stickiness during handling.
You can freeze unbaked cookie logs for up to 3 months.
Nutrition
- Serving Size: 1 cookie
- Calories: 100
- Sugar: 6g
- Sodium: 50mg
- Fat: 4g
- Saturated Fat: 2g
- Unsaturated Fat: 2g
- Trans Fat: 0g
- Carbohydrates: 15g
- Fiber: 0g
- Protein: 1g
- Cholesterol: 25mg